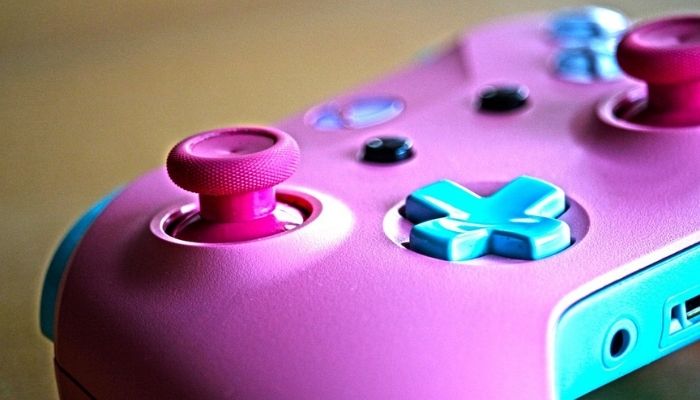
Customizing a PS4 Controller may give your console a unique look and add some passion to your games. There are a few procedures to take to ensure a long-lasting appearance. Because this is a thermoplastic material, it is vital to follow the cleaning and preparation stages to ensure proper adhesion of the paint. In this guide, we will demonstrate about How to Paint PS4 Controller?
Considering incredibly flexible acrylic paint, you can also put it on your ps4 controller. Another easy way to modernize your consoles is to give them a fresh coat of paint. It is best accomplished with spray paint, but wear a protective mask to avoid breathing excessive fumes. Start by removing the controller or console’s plastic shell, paint it with a primer coat, and then paint on your selected color (s).
Sanding Process and Its Applications

Sanding is the process of smoothing down a rough surface, most commonly plastic metal and wood. It is a technique used to polish or smooth a surface.
A sander is often used to smooth regions, and it is a powerful instrument used to polish surfaces using sandpaper rubbing. Sanding imparts a beautiful finish to various objects, including controllers, guitars, and 3D printing.
Read Also How Much Will a Pawn Shop Give Me for a PS4
Types of Sand Papers
There are two types of sandpaper in the sanding process; the first is Dry Sanding, which is the most common type of sanding that most people are familiar with and is used on different surfaces. Typically, dry sanding is done to level out a surface.
The second type is Wet Sanding, which is sanding down material using an adhesive mixed with water. The water or other liquid aids in the removal of any grit fragments remaining on the sandpaper after dry sanding, resulting in a clean and glossy surface.
Movements During Dry and Wet Sanding
Dry sanding requires a different movement than wet sanding. Dry sanding involves using small circles, whereas wet sanding requires the use of horizontal lines and alternate directions between rounds. It is to eliminate scratches from prior rounds. Wet sanding requires a soft touch because you will only be removing surface scratches and not much material.
Use of Dry and Wet Sandpaper
Dry sandpaper will be more abrasive, particularly with finer grit sandpaper. It enables you to mold your object or grind down uneven surfaces considerably to even them. Wet sandpaper is used significantly later to enhance the object’s luster or prepare it for cleaning and polishing.
Unlike dry sandpaper, wet sandpaper avoids concentration, which occurs when the paper becomes gummed up from the removed surface material. The liquid lubrication and the unique design of the rough side of the wet paper force the dirt away from the abrasive particles.
What Type of Paint Is Appropriate for Use on a Ps4 Controller?
It is explicitly designed to adhere to plastic. Additionally, you can use acrylic spray paint, but it will cover the majority of the controller. Regular acrylic paint is the method to go if you want to create designs or even various color blocks. If you go for spray paint, you can use the Evolve Elite set.
Paint on PS4 Controller
To learn How to Paint PS4 Controller, you must follow the instructions outlined below.
Disassembly of Controller Parts
- Start by removing four screws from the controller’s back.
- Disconnect the cable that connects the light strip to the mainboard.
- Remove the screw from beneath the battery.
- Disconnect the cable that connects the touch-pad to the mainboard.
- Discard all buttons.
- Discard the plastic bits that comprise the light bar.
- Remove the two nuts that secure the USB port board in place.
Use of Wax Cleaner
- During sanding and priming, you can use a wax cleaner, typically included with primers and other similar products.
- Dries quickly and effectively removes anything that may affect the paint.
Read Also How to Use Sticky Bombs in GTA 5 PS4
Use of Filler Primer
- You have two primary options to consider: filler primer or sandable primer, followed by primer sealer as the last application.
- If you are using the primer, then perform wet sanding. If you want the colour to pop slightly more, look for a white or highly light grey primer.
- First, apply the Filler primer or sandable primer gently but evenly coat the entire product to fill in tiny surface blemishes or minor scars that may have occurred throughout the modifying operation.
Use of Primer Sealer
- If you prefer not to utilize a primer or need to save cash, you can also use an adherence booster, mainly used on plastics and other objects that had difficulties holding paint.
- You may use it for the controllers because they are made of plastic, and this item is designed for them.
- Following that, apply primer-sealer, thoroughly seal the primer, create an excellent smooth surface, and aid in the paint’s bonding.
- There is no need to sand this as your preceding primer should be pleasant to the touch; this seals the surface and aids in bonding.
Use of Sandpaper
- Sand the exterior of the controller gently with a fine-grit sandpaper.
- You can also use 400 grit, making sure to get into all of the gaps.
- It will aid in the exterior paint adhesion to the controller’s exterior, resulting in a more attractive finish.
- Wash the shell in the water after polishing to eliminate all plastic dust and dirt.
- Wrap the inside of the controller with blue painters adhesive; this prevents the paint from getting on the inside and simplifies reassembling the device tenfold.
Designing on Controller
- Give the controller a blue base colour.
- Using a xacto knife, cut out the required design from blue painters tape.
- Apply the design on the painted controller and repaint it a second colour.
- Then rip tape.
- Apply a clear coat of paint, such as varnish, to the surface.
Apply a Clear Coat
- Use the Clearcoat on the surface.
- A 2K clear coat is the best clear coat to use.
- This product contains a hardener that is triggered before use by pressing a button on the can.
- A 2K clear will give your controller the maximum endurance available. Alternatively, you can use a one-part can.
- It will not provide the same layer of safety or shine as the original but will look rather lovely.
Reassembly of Controller
- Retrace your disassembly procedures to reassemble the controller.
- Replace the two threads with extreme caution.

- It is where you place the ribbons into a spot with the tweezers and then presses them into the holes with your finger.
- It should always be pretty self-explanatory.
Instruction While Paint on Controller
- Which method you pick, start 4-8″ away from the controller and dust it in one smooth stroke, left to right or right to left, is most accessible.
- By doing this procedure 2-3 times until the majority of the controller is coated in colour.
- Allow at least 15-20 minutes for each coat to dry.
- Repeat the method for the subsequent few coats, but go a little thicker on the coats.
- Then you do not need to clean; keep moving steadily in one direction to avoid streaks.
- Additionally, any additional coating will be used to fill in weak areas for a lovely even coat.
- You can wait12 hours before applying a topcoat.
- Once satisfied, you can apply the topcoat or clear coat.
- Essentially, you can repeat the process from applying the paint, but this time allows at minimum 12-24 hours for it all to cure and dry before touching it.
Read More How to Fix PS4 Trigger Simple Guide
When Should We Use Wet Sanding on a Playstation 4 Controller?
It is required if you wish to get an ultra-glossy finish without skipping any procedures. You can frequently skip this stage, but it will nearly always be evident in the end. You may become dissatisfied with the finished product and wish to return to rectify the issue, which will add significant additional time to the procedure.
However, it is entirely dependent on the project at hand and the desired look. Many users desire a shiny appearance on their controllers. If you like a sleek or scraped finish, wet sanding is generally not essential. To get this shiny appearance, dry sand first, followed by wet sanding. You can always clean and polish your controller to a mirror-like shine.
FAQs – How to Paint PS4 Controller?
Can You Paint Game Controllers?
Disassemble your game controller. Remove the exterior shell, followed by the electronics and buttons below. Step 2: Spray the controller’s shell with two coats of Testors Craft 3 oz Aerosol Paint in black on a large sheet of paper or plastic. The more coats used, the more vibrant the outcome.
Can You Paint a Playstation?
Polish the PS cover and controller parts with coarse-grit sandpaper, followed by fine grain abrasive paper. It enables the paint to bond to the plastic. Cover any portions you do not want to sand, such as translucent “green light” plastic.
Is It Safe to Spray Paint on a Ps4?
Take out your preferred paint. Again, with spray paint, ensure that it is compatible with primer and plastic. Create even paint layers, preferably 2-3. Allow suitable time for the paint to cure completely before reassembling your PS.
Can You Customize a Playstation Controller?
Both PS4 controllers allow complete modification, including a removable covering, analogue joysticks, handles, triggers, and switches. You may optimize your performance by building an Infinity 4PS Pro or Impact, used by more than half of top gaming professionals and content makers.
Conclusion
Many players enjoy painting their PS4 controllers. The paint on the controller adds an elegant feel and adaptability. Game enthusiasts now have the option of customizing their PS4 controller, so you should have no difficulty in painting the Playstation 4 controller. Thus, I hope this guide has assisted you in learning How to Paint PS4 Controller? However, it is easier to paint a Playstation 4 controller, but it requires proper care.
Read More
